
Ulano CUT Green Solvent Resistant Film
Ulano CUT Green Solvent Resistant Film
Item Discontinued
Payment & Security

Your payment information is processed securely. We do not store credit card details nor have access to your credit card information.
- DESCRIPTION
- REVIEWS
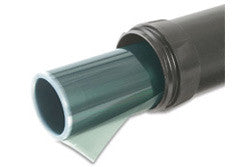
Ulano CUT Green Solvent Resistant Film | WATER-SOLUBLE ULANOCUT KNIFECUT STENCIL FILMS
ULANOCUT GREEN is a screen process knifecut stencil film coated on 300-gauge polyester. The film is adhered to screen mesh with plain water. The emulsion layer "sticks back" to the polyester for corrections. The film is compatible with all inks except those containing water.
UlanoCUT Green - Strong adhesive for detailed stencils. ULANOCUT GREEN has a stronger adhesive, making it a better choice for cutting detailed stencils.
INSTRUCTIONS
Step 1: PREPARE THE MESH
Used or surface-treated mesh need only be degreased using Screen Degreaser Liquid No. 3 or dilute Screen Degreaser Concentrate No. 33. New mesh that is not surface treated should be mechanically abraded. This increases the surface area of the mesh surface for a better mechanical bond of the stencil. Use Microgrit No. 2 before degreasing. Abrading and degreasing can be combined in one step with Ulanogel 23. Rinse thoroughly.
Step 2: CUT AND PEEL THE FILM
Cut on a hard surface, with only the artwork between the film and the work surface. A light table makes a particularly good cutting surface, combining good visibility with a hard, glass work surface. Tape down the film and artwork in all four corners. Use a sharp blade to cut the film. (A dull blade will tear the film, causing poor edge definition.) Hold the cutting blade as nearly vertical to the film surface as possible to produce good shoulders and sharp printed edges. (Angled cuts cause poor definition and lead to "burned edges" on the stencil film.) Do not bear down when cutting, as the relatively soft emulsion layer is less than 50 microns (2/1000 of an inch) thick. Excess pressure causes poor edge definition, "planed" shoulders, water-retaining grooves in the backing material, "burned edges," and poor adhesion along edges. The tip of the blade that does the actual cutting. Peeling film with the cutting blade risks snapping off the blade tip. Use a separate peeling tool. Place it slightly "inside" the cut line, on the emulsion surface to be stripped. Push the film away from the cut line and raise a small portion of the emulsion from the backing material. With the peeling tool, gradually enlarge the area of film raised until it can be grasped between the forefinger and the "blade" of the peeling tool. Peel away the film.
Step 3: ADHERE THE STENCIL
Option 1: Place the cut stencil, emulsion side up, on a firm build-up board, which is smaller than the inside dimensions of the frame. Position the prepared screen squeegee side up, over the film. Saturate a sponge with water. Move the sponge slowly in one stroke over the mesh from the squeegee side. Slightly overlap the strokes until the entire surface is adhered. Do not rub with the sponge. Blot the stencil with a pad of newsprint (unprinted newspaper stock), removing the bottom sheet 5 - 6 times.
Option 2: Using a clean sponge, thoroughly wet both sides of the mesh with water--or, better yet, use two wet sponges in tandem. Place the emulsion side of the cut and peeled stencil against the bottom of the wet screen. Using light pressure, move a wet sponge over the entire surface of the plastic backing to adhere the film to the mesh. With the frame flat, blot the film from the squeegee side with a pad of newsprint, removing the bottom sheet 5 - 6 times.
Step 4: DRY THE STENCIL; APPLY SCREEN FILLER; REMOVE THE BACKING SHEET
Wait 2 - 3 minutes after blotting, then lift the frame for drying. Drying time can be reduced by using a cool air fan. Do not dry the stencil in or near heat. When the mesh surrounding the film is dry (and before the stencil is dry), with the plastic support still in place, apply Screen Filler No. 60 or Extra Heavy Blockout No. 10 to the open area of the screen from the printing side of the mesh, going over the polyester support at its edges. Ideally, the stencil and the filler will dry together, forming a tight "knit" along edges. This method also shortens production time by combining the drying times of the stencil and the filler. After the stencil and blockout have both dried completely, peel off the plastic support. The correct technique is to start at a corner and peel the polyester back at 180 degrees, slowly, parallel to the mesh. If there is any resistance when peeling, dry the screen longer.
STENCIL REMOVAL
Remove all ink from the screen with the ink solvent recommended by the ink manufacturer as soon after printing as possible. Degrease with Screen Degreaser Liquid No. 3 to remove remaining residues of the ink or the ink solvent from the surface of the stencil. This will speed stencil removal. Rinse the stencil (and Screen Filler No. 60 or Extra Heavy Blockout No. 10) with hot or cold water from both sides of the mesh to remove the stencil and the filler/blockout at the same time.
- Choosing a selection results in a full page refresh.
- Opens in a new window.