How to Choose a Manual Screen Printing Press
Choose a press around the work you expect to produce—not the model name or starting price alone. Compare the exact configuration with your artwork, products, operators, and complete shop workflow.
A manual press is one part of the production process. Plan screen preparation, printing, flashing, curing, cleanup, and garment handling together.
1. Define Your Typical Orders
Prepare examples of the jobs you expect to print.
Include:
- Garments per order.
- Number of print colors.
- Number of print locations.
- Garment fabrics and size ranges.
- Largest artwork dimensions.
- Frequency of design changes.
- Required turnaround times.
- Available operators.
Use representative artwork when requesting a recommendation. A daily garment target alone does not establish the correct press.
2. Separate Garment and Graphic Applications
This collection includes garment presses and the Proto-Press Graphic Press.
Confirm the intended substrate and printing arrangement before comparing models.
For garment work, review pallet dimensions, garment loading, print locations, and flashing requirements.
For graphic applications, provide the substrate material, dimensions, thickness, artwork requirements, and intended handling method. Do not assume a garment carousel and a graphic press are substitutes for the same job.
3. Compare the Listed Models by Exact Configuration
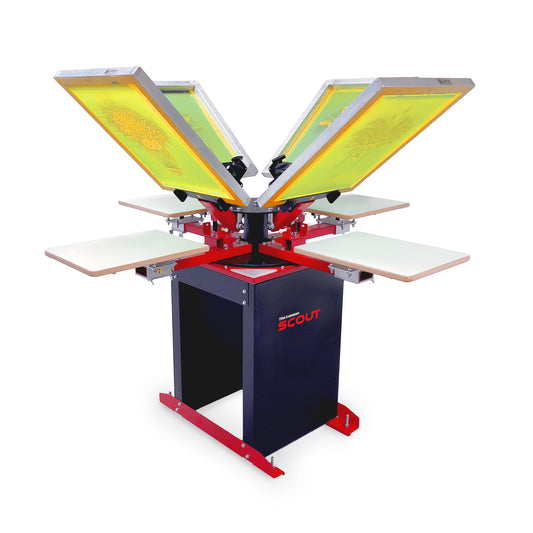
Use the individual listings to begin your comparison:
Ask for the exact configuration in the quote. Do not assume every variant has the same color capacity, station count, registration features, or included equipment.
4. Understand Color Capacity and Station Count
Compare these specifications separately.
Color capacity concerns the available printing positions for the proposed setup. Station count concerns the working positions used within the press layout.
Ask how the configuration accommodates:
- Your artwork and color separations.
- Garment loading and unloading.
- Flashing.
- Print-flash-print sequences.
- Operator movement.
- Required production steps.
Have the equipment team walk through a representative job. Do not infer complete workflow capacity from a configuration label alone.
5. Review Registration and Adjustment Features
For multicolor work, compare how the proposed press supports setup and alignment.
Review:
- Registration adjustments.
- Screen-clamping arrangement.
- Off-contact adjustment.
- Screen-height or tilt adjustments, where offered.
- Locking and setup procedures.
- Access for making adjustments.
Request a demonstration using artwork similar to your work. Avoid treating a feature name as a guarantee that registration cannot move or that every setup will be quick.
6. Confirm Screen Size and Usable Print Area
Match the press to your screens and artwork.
Check:
- Supported screen-frame dimensions.
- Maximum usable print area.
- Screen-clamp compatibility.
- Included pallet dimensions.
- Artwork placement.
- Required clearances.
A screen that fits the clamps does not automatically establish that the entire image can be printed as intended.
If you already own screens, provide their dimensions and construction details before purchasing.
7. Choose Pallets Around the Garment and Print Location
Compare the included pallets with the products you intend to print.
Review requirements for:
- Adult and youth garments.
- Front and back designs.
- Sleeves.
- Labels or small print areas.
- Other specialty products.
Confirm the exact accessory, mounting system, and supported press model. Do not assume pallets are interchangeable across every Lawson or Workhorse press.
Also check whether a specialty pallet is included or sold separately.
8. Evaluate the Full Working Footprint
Measure more than the press’s closed or stationary dimensions.
Plan for:
- Press rotation and movement.
- Operator access.
- Garment loading.
- Flash-unit placement.
- Screen changes.
- Maintenance.
- Nearby curing equipment.
- Garment staging and storage.
Check the delivery route as well, including doorways, hallways, stairs, unloading access, and placement requirements.
A press described as compact should still be evaluated in the actual workspace.
9. Plan Flashing and Final Curing Separately
Confirm how the press will work with your intended ink and curing equipment.
Provide:
- Ink products.
- Garment fabrics.
- Artwork coverage.
- Flashing sequence.
- Order quantities.
- Existing dryer or flash equipment.
Request the utility and installation requirements for the complete setup. Do not assume that a manually operated press means the entire printing workflow needs no electrical, ventilation, or other site preparation.
Follow the ink and equipment manufacturers’ curing and verification instructions.
10. Compare Standalone Equipment With a Startup Package
If you already own compatible supporting equipment, a standalone press may be the purchase to evaluate.
If you are building a new workflow, compare the press with a startup package and identify what is included separately:
- Flash equipment.
- Final curing equipment.
- Exposure equipment.
- Screens.
- Squeegees.
- Inks.
- Screen-preparation tools.
- Cleaning and reclaim supplies.
Request an itemized quote. Do not assume a press purchase includes a complete production setup.
Compare Screen Printing Startup Packages
11. Verify Accessories and Expansion Options
If future growth matters, discuss it before purchasing.
Ask about:
- Supported pallet options.
- Model-specific accessories.
- Available configurations.
- Documented expansion options.
- Installation requirements for changes.
- Components that cannot be upgraded.
Do not assume every manual press can gain additional colors or stations, or that all accessories fit every model.
12. Review Total Cost, Training, and Support
Compare the complete project cost rather than the advertised starting price.
Confirm:
- Exact press and configuration.
- Included pallets and hardware.
- Required accessories.
- Freight and unloading.
- Assembly or installation.
- Training options.
- Technical-support procedures.
- Applicable warranty terms.
Ask which services are included and which are available separately. Confirm service hours and support scope rather than assuming round-the-clock assistance.
Before You Request a Quote: Manual Press Checklist
Have these details ready when contacting Lawson Workhorse Group:
- Application: Garment printing or graphic printing.
- Typical jobs: Quantities, colors, locations, and turnaround requirements.
- Products: Garment types or other substrates.
- Artwork: Typical and maximum dimensions.
- Screens: Existing frame dimensions and construction.
- Staffing: Number of available operators.
- Current equipment: Flash, dryer, exposure equipment, and other items you will keep.
- Workspace: Dimensions, operating clearance, and delivery access.
- Utilities: Available services for the complete workflow.
- Budget: Total equipment and installation budget.
- Growth plans: Potential future applications or capacity needs.
- Press of interest: Model and proposed configuration.
Get Help Choosing Your Manual Press
Contact Lawson Workhorse Group with your job profile, workspace, equipment, and budget. Include representative artwork and the press models you are considering.
Request a written quote confirming the exact configuration, included items, delivery arrangements, installation requirements, and available training before ordering.
Explore Screen Printing Classes

 SaleVendor:Lawson Workhorse Group (LWG)
 Vendor:Lawson Workhorse Group (LWG)
 Vendor:Lawson Workhorse Group (LWG)
 Vendor:Lawson Workhorse Group (LWG)
 Vendor:Lawson Workhorse Group (LWG)
 Vendor:Workhorse Products


