
Jet Opaque Inkjet Transfer Paper for Dark-Colored Garments
Jet Opaque Inkjet Transfer Paper for Dark-Colored Garments
Couldn't load pickup availability
Payment & Security

Your payment information is processed securely. We do not store credit card details nor have access to your credit card information.
- DESCRIPTION
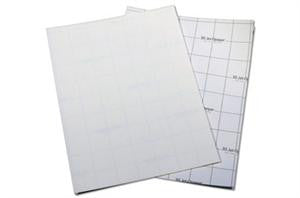
Jet Opaque Inkjet Transfer Paper for Dark-Colored Garments: The Paper Professionals Use
Jet Opaque Heat Transfer Paper is designed for printing and transferring images onto cotton and cotton/poly blend shirts, puzzles, mousepads, coasters, and more. Select items that can withstand temperatures up to 360°F without melting. For best results, use dark-colored material with a smooth surface. Inkjet printers with dye-based inks work best, though pigmented inks (e.g., photo inks) may be used. Limit ink usage by selecting printer settings such as "Plain Paper" and "Medium Quality." Excessive ink is costly and reduces image quality and durability.
You will need the following items:
- A pre-washed and dried dark-colored T-shirt (pre-washing is recommended for both 100% cotton and 50/50 blends)
- A hard, flat surface, such as a countertop (do not use glass, metal, or an ironing board)
- An iron, emptied of water and preheated for at least 8 minutes on the cotton setting
- Or a preheated commercial heat press
Printing & Application Instructions
Click here for a printable PDF
- Print on the Jet Opaque paper using the side without the line.
- DO NOT FLIP OR REVERSE THE IMAGE. Select a printer setting that minimizes ink usage (e.g., Plain Paper, Transfer Paper, or Special Paper). Ensure the image is completely dry before transferring.
Printing
The print side is the unprinted side of the sheet. Follow your printer’s instructions for loading and feed one sheet at a time. Print right-side reading. DO NOT MIRROR THE IMAGE.
Suggested Printer Settings
- HP: Plain Paper or Iron-on Transfer at Normal or Best quality. Not recommended for HP 1200C or 1600C.
- Epson: Plain Paper, 360 dpi Inkjet Paper, or Photo Quality Paper at 360 or 720 dpi.
- Canon: T-shirt Transfer at default settings.
- Lexmark: Iron-on Transfer at Best quality (600 or 1200 dpi).
Do not leave a margin around the image edge; any unprinted white material will transfer to the garment. Round the edges when possible to improve adhesion. Carefully remove the paper backing by tearing a corner and peeling it away from the front of the sheet. You may tear a corner and begin peeling before trimming excess white material.
Transferring the Image
Hand Ironing: Preheat the iron to the hottest setting, emptied of water, and set to dry. Iron the shirt to remove wrinkles and excess moisture. Use a safe, hard surface like a countertop (avoid wood, glass, or metal surfaces). Place the transfer face-up on the garment and cover it with the ironing sheet. Iron with firm pressure in straight vertical and horizontal lines, overlapping the edges. For an 8.5 x 11” sheet, iron for 1.5 minutes; for a half sheet, iron for 1 minute. Iron a second time using the same technique and duration. Let the fabric cool completely, then peel the ironing sheet with an even motion.
Heat Press: Set the heat press to 350°F. Pre-press the fabric for a few seconds to remove wrinkles and moisture, then allow it to cool. Place the transfer face-up on the garment and cover with the ironing sheet. Using medium pressure, press for 30 seconds. Allow the transfer to cool before removing the paper in an even motion.
Storage of Paper: Return unused paper to a sealed bag and store in a cool, dry environment away from heating and cooling sources.
Washing Instructions
- Wait at least 24 hours before washing the garment for the first time.
- Turn the garment inside out to minimize abrasion on the transfer during washing.
- Wash in cold water with a mild detergent.
- DO NOT USE BLEACH.
- Remove the garment from the washer immediately and air dry. If left wet, inks may bleed. If tumble drying, use the air-only setting or low temperature to keep the image clear and bright.
- Do not iron directly on the transferred area.
Tips
- If the shirt’s color shows through the transfer paper:
- Hand Ironing: The iron may be too hot or applied too long. Reduce the iron’s temperature setting first, as cotton settings vary by iron.
-
Heat Press: Try:
- Reducing pressure,
- Lowering temperature, or
- Shortening press time.
- To preserve the image, save the reusable ironing sheet and lightly touch up the image for 5–10 seconds after each wash. Allow the ironing sheet to cool before removing.
- Choosing a selection results in a full page refresh.
- Opens in a new window.